widget
But it is a very effective and useful stroke. It is one of the sets of strokes that are considered to be survival strokes and has a very important part to play in rescue.
It is a survival stroke because it can be done slowly, with minimum effort and you can keep your head above water the whole time you are swimming.
It is a rescue stroke because it allows you to use one arm for support of another swimmer whilst your other limbs swim.
But I don't care what the textbooks say, this is not an easy stroke to master. Although each movement is similar to movements in everyday life, each limb moves differently from each other. So unless you are a person that can easily pat your stomach whilst you pat your head, this is going to take some practice.
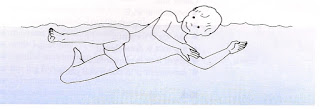
You start in the glide position: directly on your side with your lower arm extended beyond your head and your upper arm resting along the side of your body (Fig. 1).
Sidestroke Leg Action
The leg action is called the scissor kick.
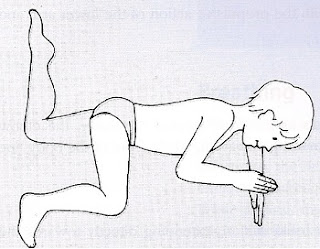
From the glide position your legs bend together to a position like that shown in fig 2.
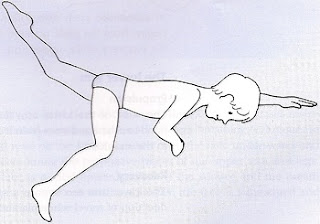
Your legs then separate, with your top leg (that is the leg nearest the surface of the water) moving forwards, keeping your knee slightly bent and your foot dorsi-flexed (Fig. 3).
The action is similar to taking a big forward step.
At the same time, your lower leg is extended backwards, keeping your knee slightly bent and your toes pointed (foot plantar-flexed). Just like taking a big backwards step (Fig. 3).
The foot of your top leg starts by whipping into plantar-flexion as you straighten both legs, sweeping outwards and around as you do the kick, finally coming together into your glide position (Fig. 4).
Don't get too concerned about this description because your legs will do the right thing. All you have to worry about is starting wide and sweeping reasonably quickly together into the glide and you will have done an acceptable scissor kick. Take a look at the second half of the video in my other post to see the scissor kick in action.
Beginning from the glide position, your lower arm will push you along as your upper arm moves to it's starting position and then the upper arm moves to push you along whilst you lower arm moves into position.
The lower arm
Propulsion: The wrist of your lower arm flexes as the hand catches the water; the elbow bends as the hand sweeps in a curved shape, pulling down until it reaches your shoulder (Fig. 5).
Return to starting position (recovery): The lower arm recovers to it's starting position in a spear-like action, until it returns to it's starting glide position, extending directly towards the direction of travel while maintaining maximum streamlining (movement through the water), palm down (Fig. 6).
The upper arm Recovery: Your elbow and your wrist flex to allow the hand to move up beside the body, into a position in front of the lower shoulder, where your wrist straightens and your hand extends (Fig. 5).
Your arm and your hand stay as close to your body as you can get them during this phase to maximise your streamline or movement through the water.
Propulsion: From this bent arm position, your hand turns away from your body and pushes in a curve to your thigh, ending back in a glide position (Fig. 6).
Your upper arm works together with your legs, both recovering and propelling at the same time. Your lower arm works in opposition to this, propelling as your arms and legs recover.
Again don't let yourself get confused by this description. Just check out the second half of the video in the post I just linked to and it will help you understand what I have written and what you are supposed to do.
In sidestroke, your head should rests on your lower shoulder with the face under water. Exhaling takes place during the propulsive phase of your upper arm and legs.
While gliding, your face is turned upwards, clear of the surface and it is there you can take a breath (Fig. 8).
Your head should then turn back to rest on your shoulder, your face under the water ready for your next stroke cycle to begin.
Dropdown
Subject Search Bar
Amazon Link Only Ads
Sidestroke: Learn How To Swim It Well
But it is a very effective and useful stroke. It is one of the sets of strokes that are considered to be survival strokes and has a very important part to play in rescue.
It is a survival stroke because it can be done slowly, with minimum effort and you can keep your head above water the whole time you are swimming.
It is a rescue stroke because it allows you to use one arm for support of another swimmer whilst your other limbs swim.
Sidestroke features
The main features of this stroke are: it allows you to see clearly in the direction you are traveling and swim with uninterrupted breathing.But I don't care what the textbooks say, this is not an easy stroke to master. Although each movement is similar to movements in everyday life, each limb moves differently from each other. So unless you are a person that can easily pat your stomach whilst you pat your head, this is going to take some practice.
How to Start to Learn Sidestroke
Most beginners will have a preferred side on which to start. If you are one of these people don't fight it, just start on that side. In time you should be able to perform it on both sides.You start in the glide position: directly on your side with your lower arm extended beyond your head and your upper arm resting along the side of your body (Fig. 1).
Sidestroke Leg Action
The leg action is called the scissor kick.
From the glide position your legs bend together to a position like that shown in fig 2.
Your legs then separate, with your top leg (that is the leg nearest the surface of the water) moving forwards, keeping your knee slightly bent and your foot dorsi-flexed (Fig. 3).
The action is similar to taking a big forward step.
At the same time, your lower leg is extended backwards, keeping your knee slightly bent and your toes pointed (foot plantar-flexed). Just like taking a big backwards step (Fig. 3).
Complete the Sidestroke Scissor Kick
From the fig 3 wide leg position, your feet are sweep together. Like as if your legs are a big pair of scissors that are cutting the water as you bring them together.The foot of your top leg starts by whipping into plantar-flexion as you straighten both legs, sweeping outwards and around as you do the kick, finally coming together into your glide position (Fig. 4).
Don't get too concerned about this description because your legs will do the right thing. All you have to worry about is starting wide and sweeping reasonably quickly together into the glide and you will have done an acceptable scissor kick. Take a look at the second half of the video in my other post to see the scissor kick in action.
Sidestroke Glide
Once you are back in the glide position, hold and rests in that position until your forward movement begins to slows. Only then should you begin the next cycle. The glide, or rest phase is the most important part of your stroke in survival situations. It allows your body time to rest and hence increases the length of time you can swim.Sidestroke Arm Action
In sidestroke, each arm follows a different path.Beginning from the glide position, your lower arm will push you along as your upper arm moves to it's starting position and then the upper arm moves to push you along whilst you lower arm moves into position.
The lower arm
Propulsion: The wrist of your lower arm flexes as the hand catches the water; the elbow bends as the hand sweeps in a curved shape, pulling down until it reaches your shoulder (Fig. 5).
Return to starting position (recovery): The lower arm recovers to it's starting position in a spear-like action, until it returns to it's starting glide position, extending directly towards the direction of travel while maintaining maximum streamlining (movement through the water), palm down (Fig. 6).
The upper arm Recovery: Your elbow and your wrist flex to allow the hand to move up beside the body, into a position in front of the lower shoulder, where your wrist straightens and your hand extends (Fig. 5).
Your arm and your hand stay as close to your body as you can get them during this phase to maximise your streamline or movement through the water.
Propulsion: From this bent arm position, your hand turns away from your body and pushes in a curve to your thigh, ending back in a glide position (Fig. 6).
Sidestroke Timing
So basically, as your lower arm propels you, your upper arm recovers. Then your upper arm propels you whilst your lower arm recovers. At the end of each, cycle you glide.Your upper arm works together with your legs, both recovering and propelling at the same time. Your lower arm works in opposition to this, propelling as your arms and legs recover.
Again don't let yourself get confused by this description. Just check out the second half of the video in the post I just linked to and it will help you understand what I have written and what you are supposed to do.
Sidestroke Breathing
Although your face may be held clear of the water all the time, this position increases your resistance and can be very tiring, so you should try and master a simple and efficient breathing technique.In sidestroke, your head should rests on your lower shoulder with the face under water. Exhaling takes place during the propulsive phase of your upper arm and legs.
While gliding, your face is turned upwards, clear of the surface and it is there you can take a breath (Fig. 8).
Your head should then turn back to rest on your shoulder, your face under the water ready for your next stroke cycle to begin.
Enjoy
Richard
Richard


No comments:
Post a Comment